How to create Google posts?
How to create and publish Google posts from Localistico.
Localistico allows at the moment to create and publish Google posts from the campaigns tab. Posts can be launched for all the venues, a group of venues, or just for one store. Managing Google posts from Localistico allows you to create more targeted campaigns for your customers locally, as you may also allow your store managers to create Google Posts by giving them access to Localistico tool.
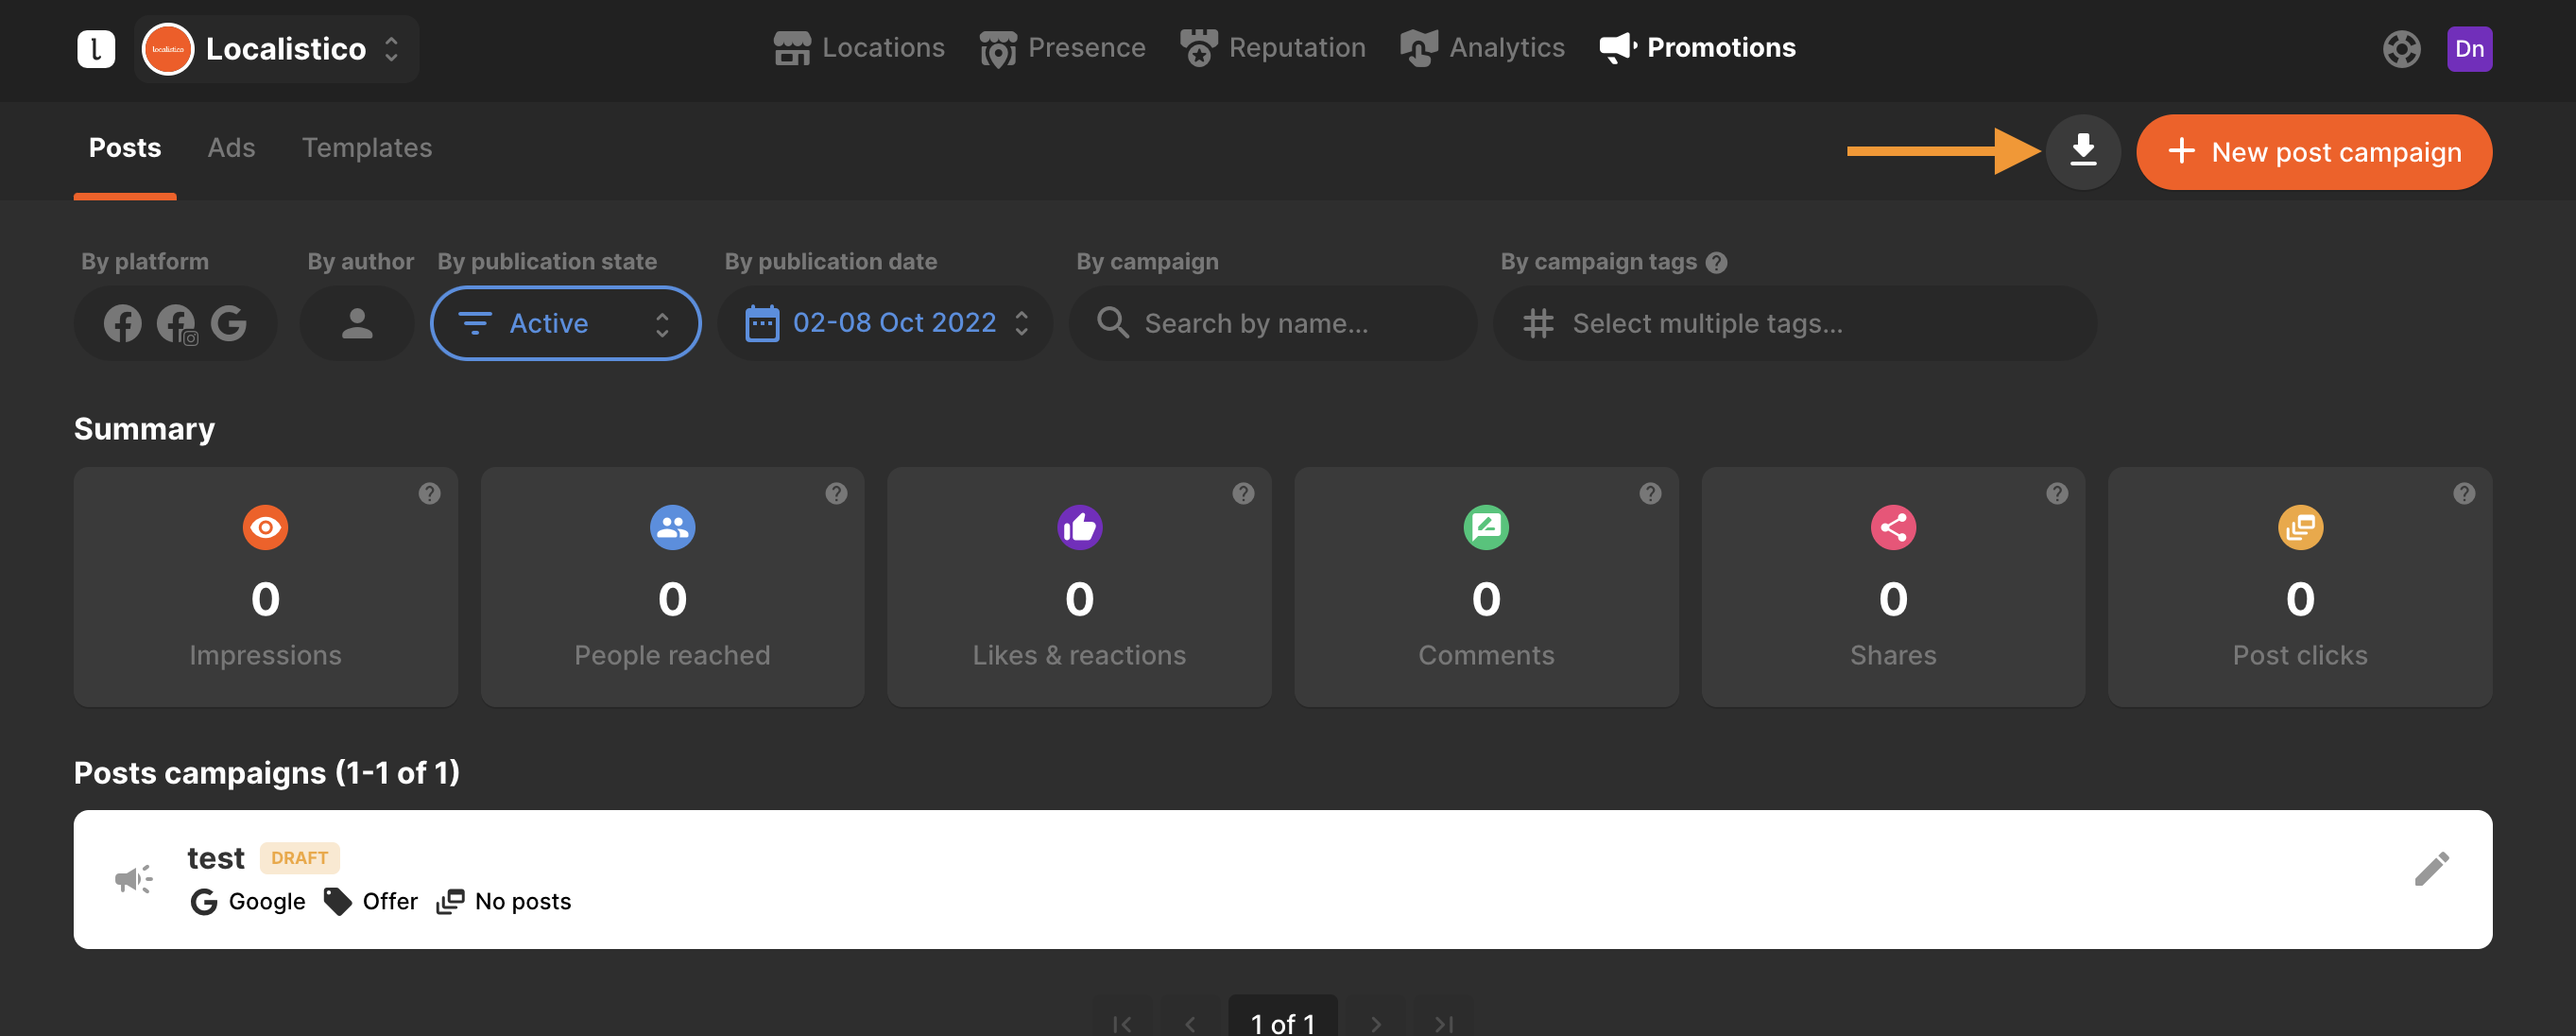
In order to create a campaign, navigate to the Promotions tab and open Posts. Click on +New post campaign to create your first Google post:

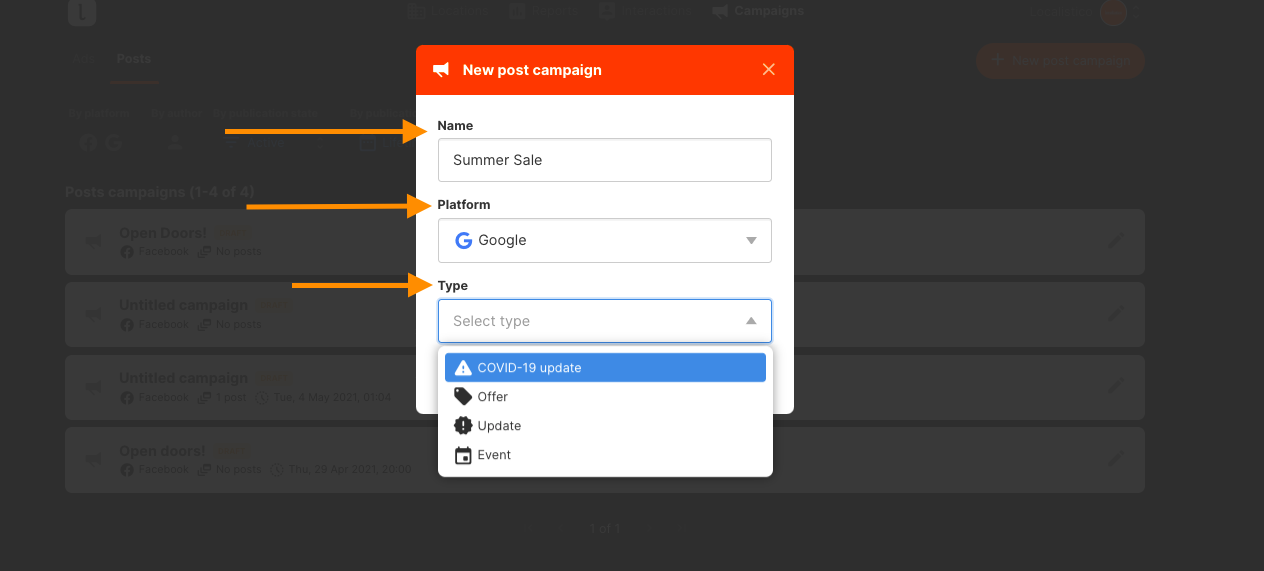
Set a name for your campaign and select the platform, Google. Localistico currently allows creating the posts in Facebook and Google. If you would like to know how to create posts on Facebook, please refer to the related article. And finally, select the post type. The post type defines the field that you will have to set up the post. An offer, for example, allows you to set up a discount code in the post. Read more about the post types from this article.
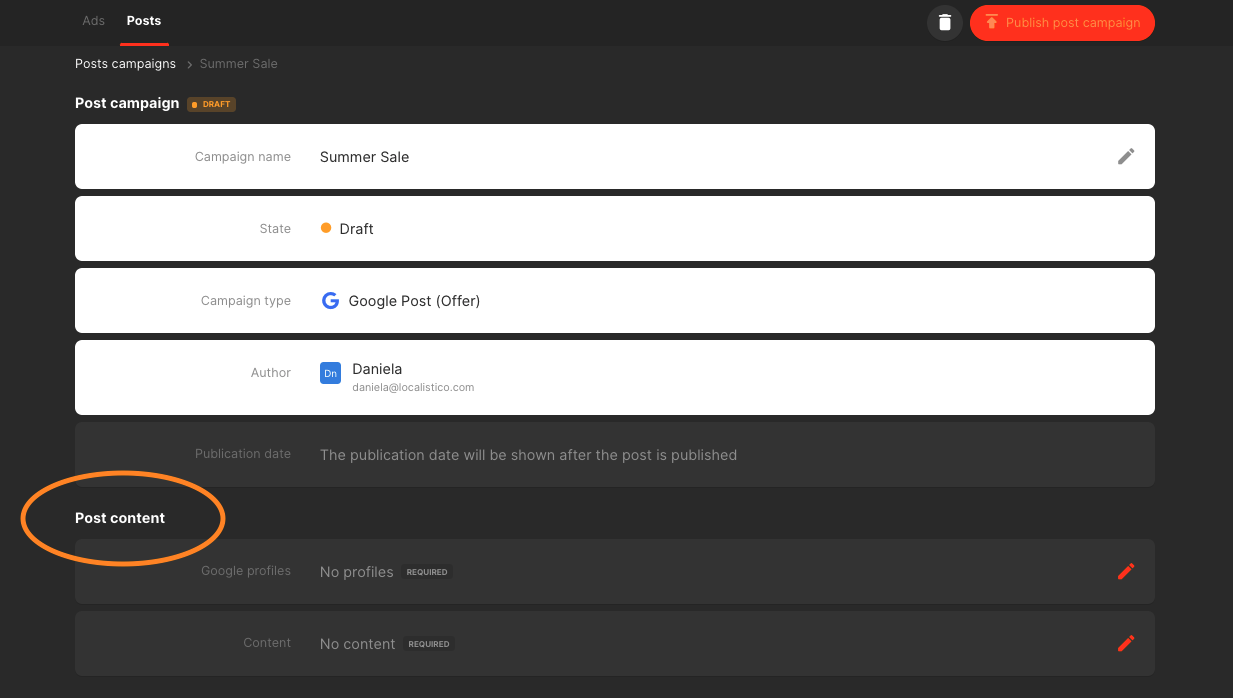
Then select the venues you would like to include to your post campaign and add the content and schedule when you would like to have the post published.
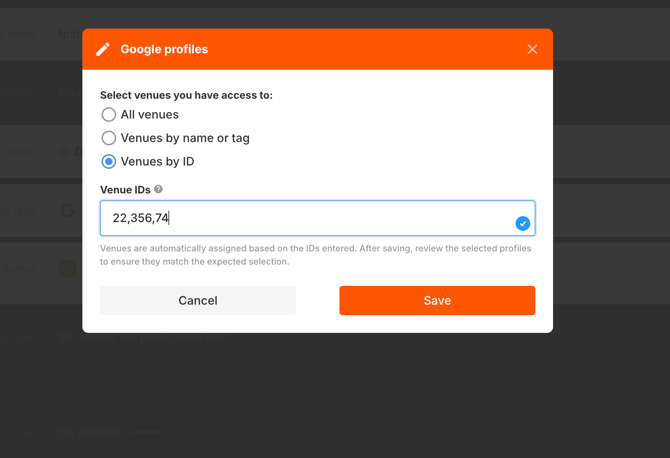
Localistico includes by default all the venues in the campaign. If you want to include a subset of the venues, those can be added by applying a tag or each venue manually. In this example, we are going to include the venues with the tag "London". If you don't know yet how to create tags, you may have a look at this article.
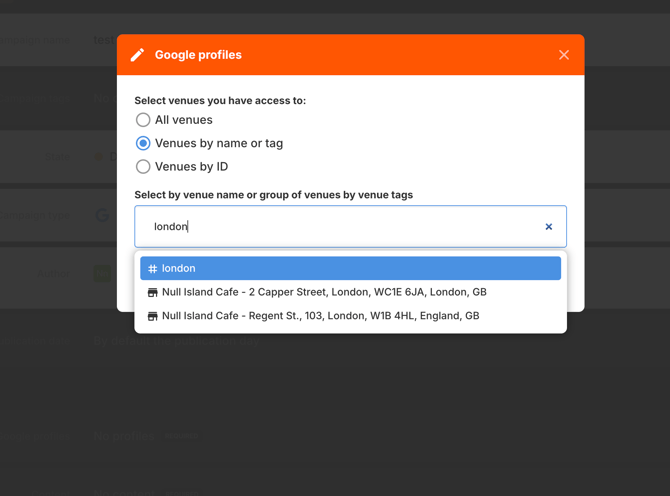
You can also select the venues by entering one or more venue IDs separated by commas.
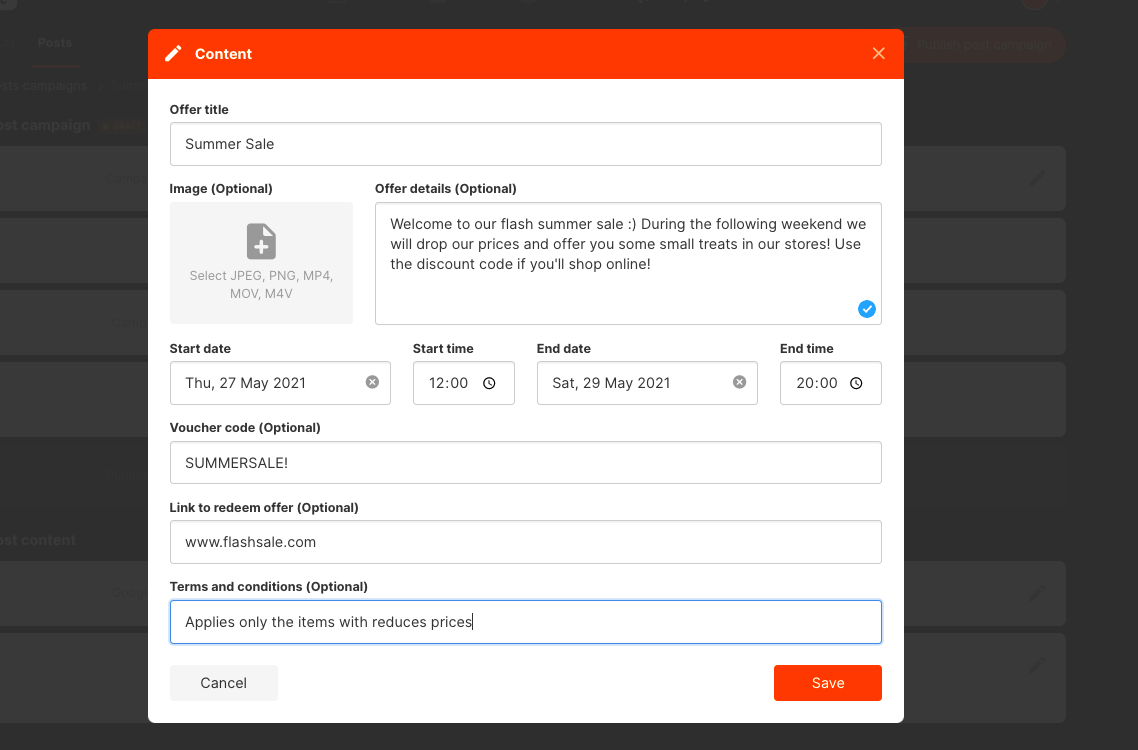
The next step is to fill in the content that is available for the selected post type:
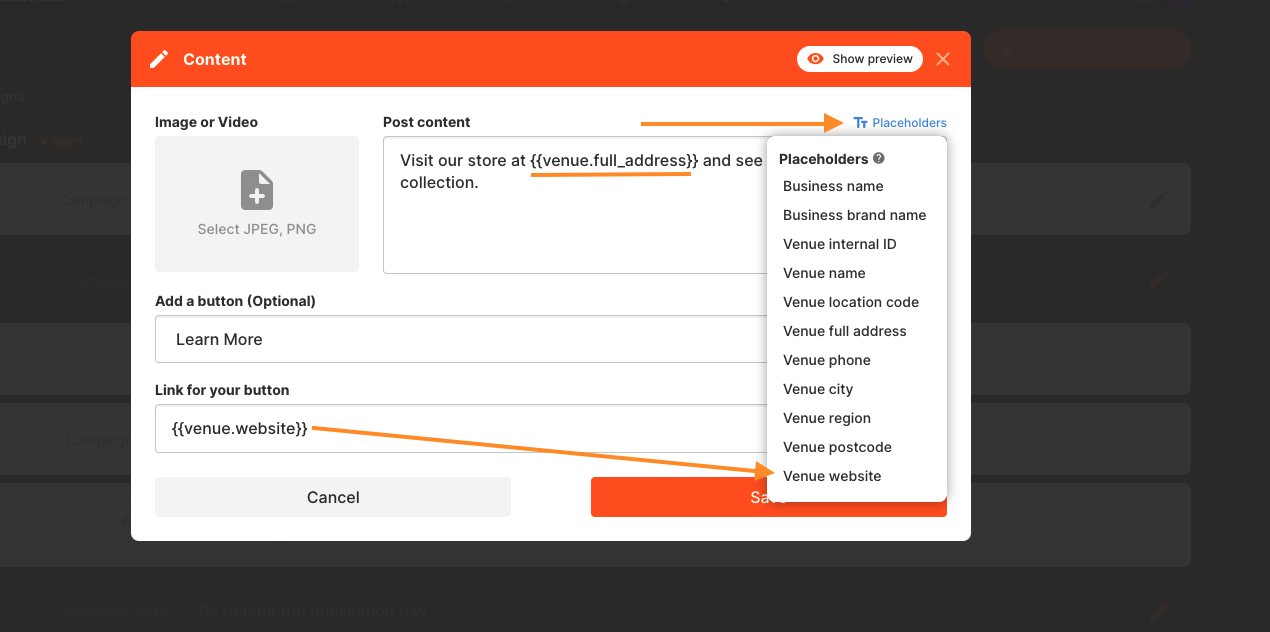
To locally optimise your posts, use the placeholder to take the information from your venue settings:
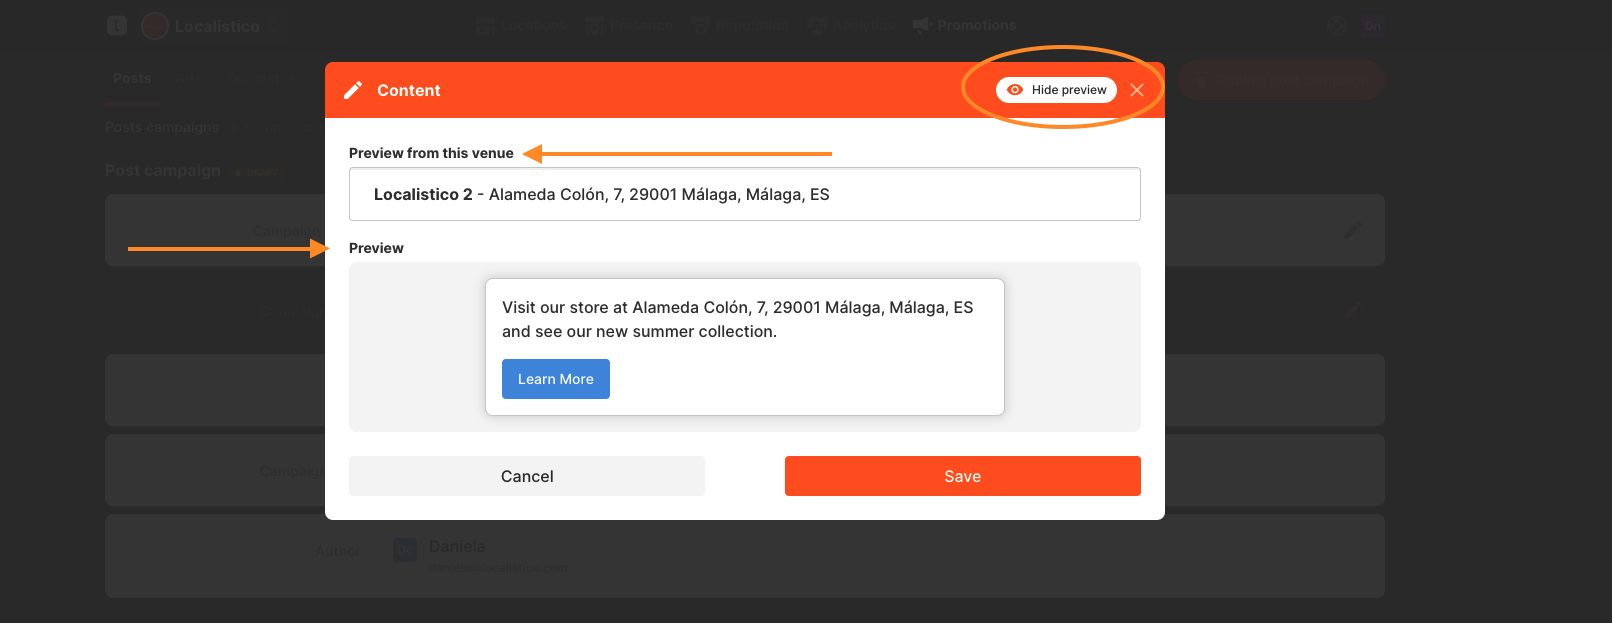
To preview the campaign, click on "show preview". You can select the venue you would like to use for the preview:
Check the requirements for the Google Posts photos from here.
When the post campaign is ready to be published, just click on publish post campaign -button. Please note that when publishing posts for multiple profiles, it can take a few minutes from the scheduled time before they appear in Google.
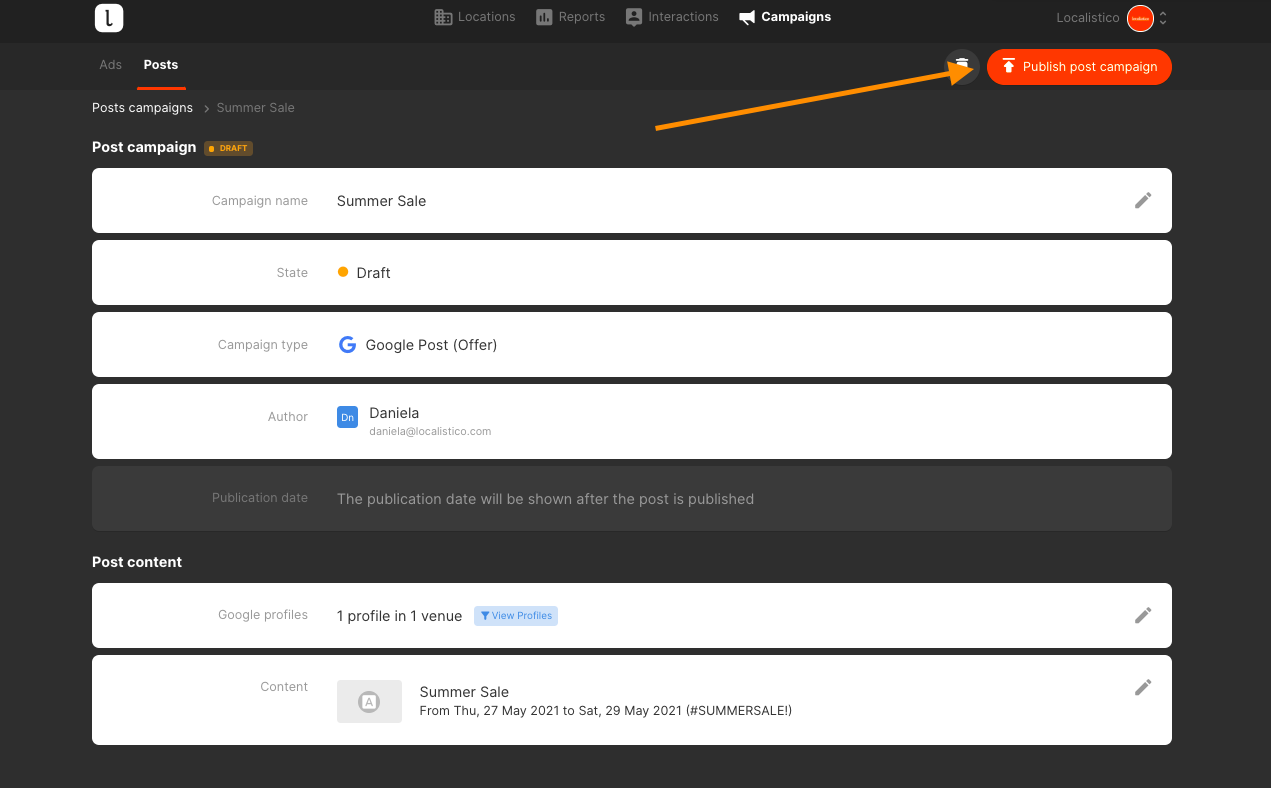
If you made a mistake on your post and noticed it after publishing the post, just click on Unpublish post campaign to remove it from Google.

Post metrics can be exported in Excel for individual posts campaigns under a specific post campaign or from Post's main page for multiple post campaigns. If you want to export post metrics for multiple post campaigns, we recommend first selecting the correct filters and exporting the metrics only for post campaigns that are necessary, since the export may take a while.
