What are Custom Fields?
Custom fields are fields that can be used to include in Localistico any data that is important to your business without having to think about platforms', such as Google's, limitations. Custom fields can be used just to store your data in Localistico, or they can be used to edit the information on your store pages.
An example could be to add the email of the store manager in Localistico as a custom field and publish it on the store page so that customers can contact the manager.
What are Custom Blocks?
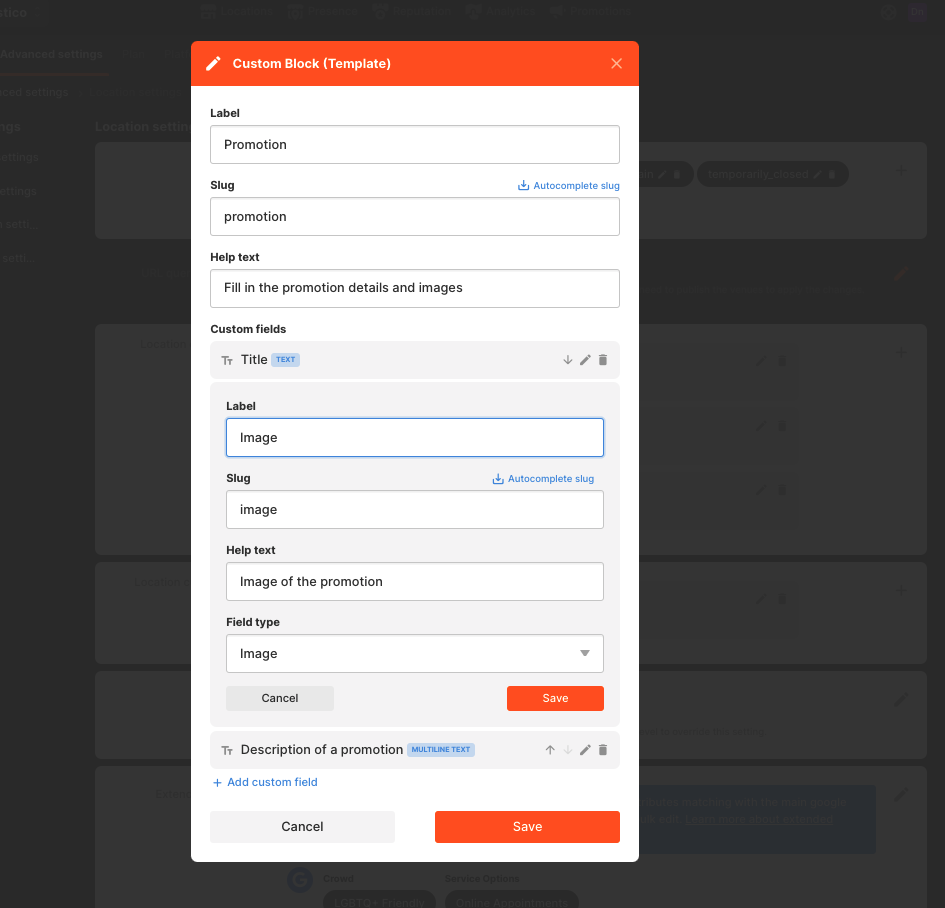
A custom block is like a custom field, but it allows users to support more complex information. While custom field is for independent values, a custom blocks allow adding more values and formats to provide more complex piece of information.
An example could be to create a promotion block in Localistico and connect that to your store pages. This block allows you to update freely the promotion details and include text, images or even piece of code.
Please note that in order to connect a custom field or block with your store pages, you need to contact your Customer Success Manager.
How to create Custom Fields in Localistico?
1. Go to Settings > Advanced Settings and select Business settings or Location Settings depending on if you would like to create custom fields for the business or for the locations. Navigate to the section called Custom Fields and click to create one:

2. Set the name for the custom field, copy the name as a slug or type one (this is a unique value and cannot be repeated for other custom fields). You may also add a help text to explain the user what kind of information should be added in this field:

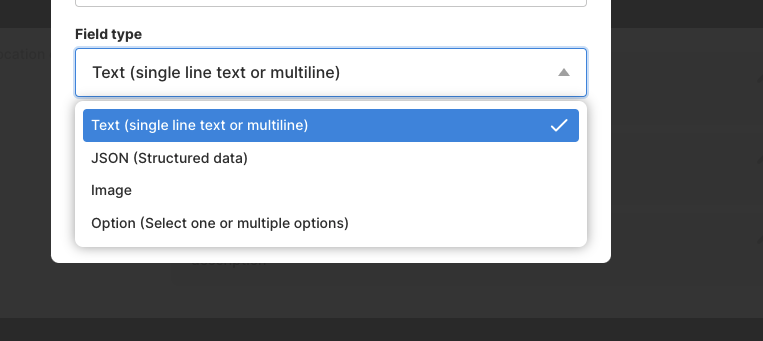
As a type of the field you can select text (single or multiline), JSON, image or options:
All custom fields can be exported with Localistico and edited in an Excel/CSV. After editing the data, the file can be uploaded to Localistico. This will populate the custom fields.
Single and multiline text:
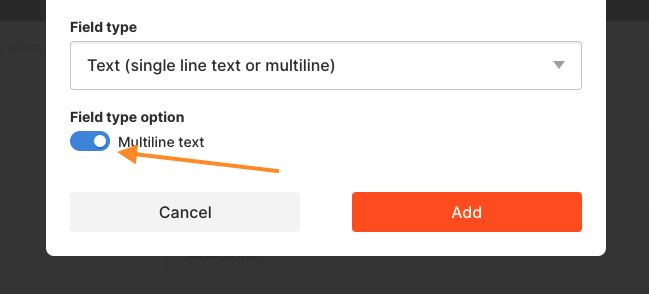
If you would like to have multiple lines in the text to add a longer piece of text (for example a description) toggle the option:
This is how it each of the options will show under the venue or business settings:
Multiline:
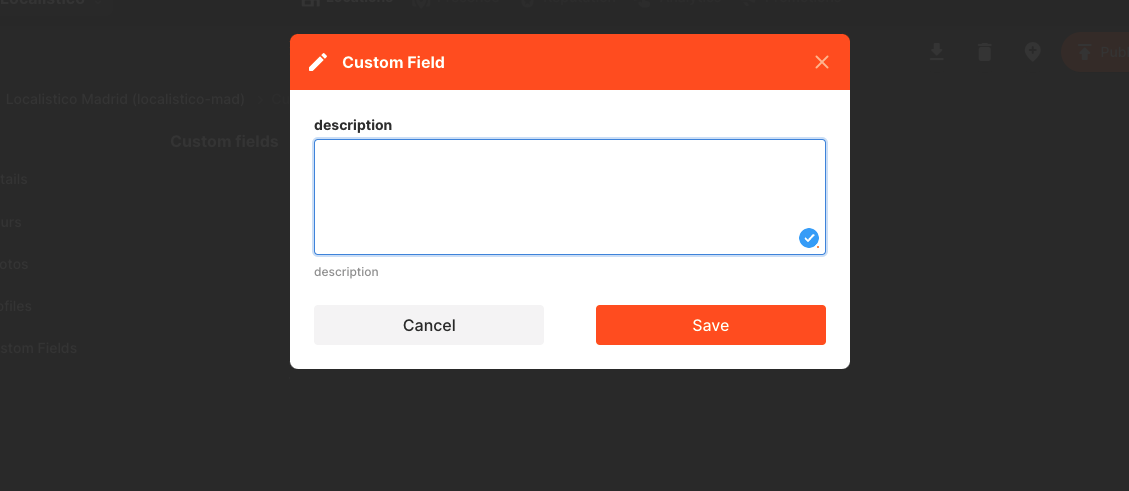
Single line:

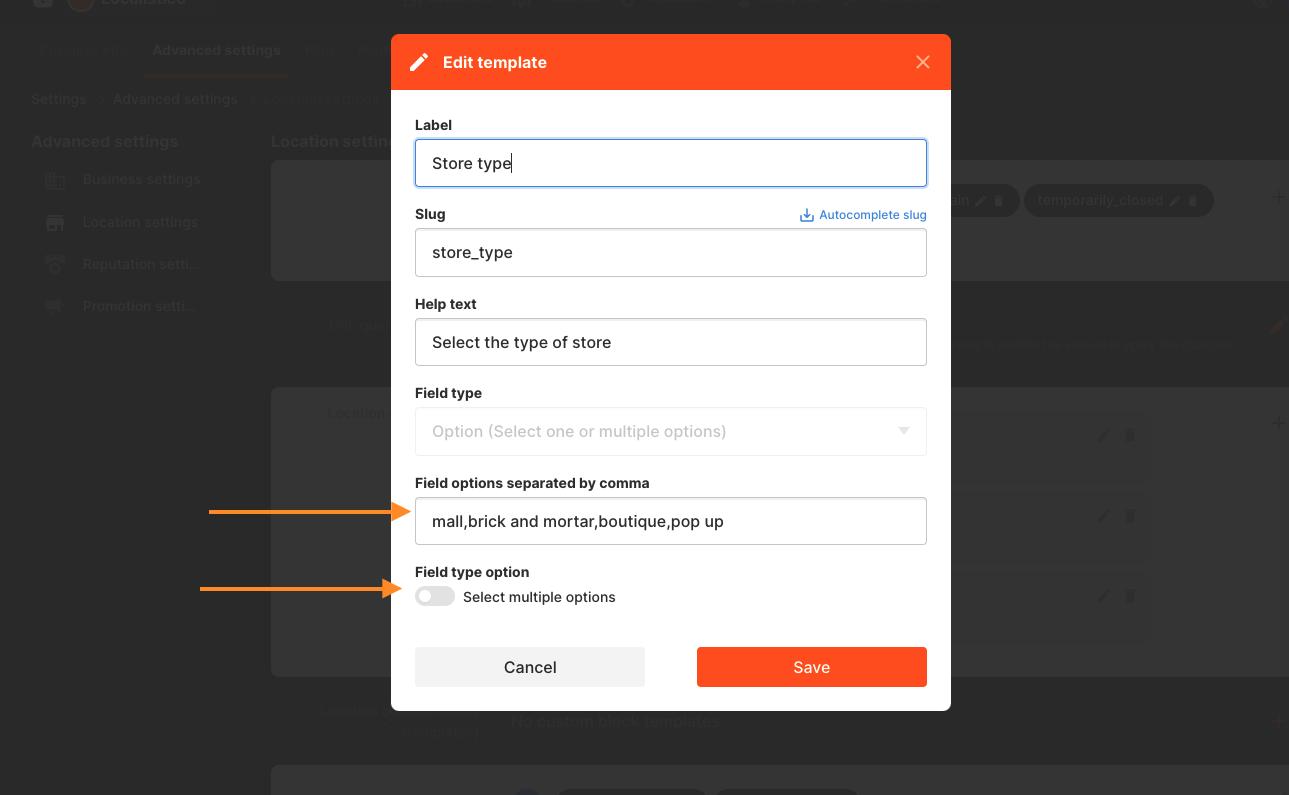
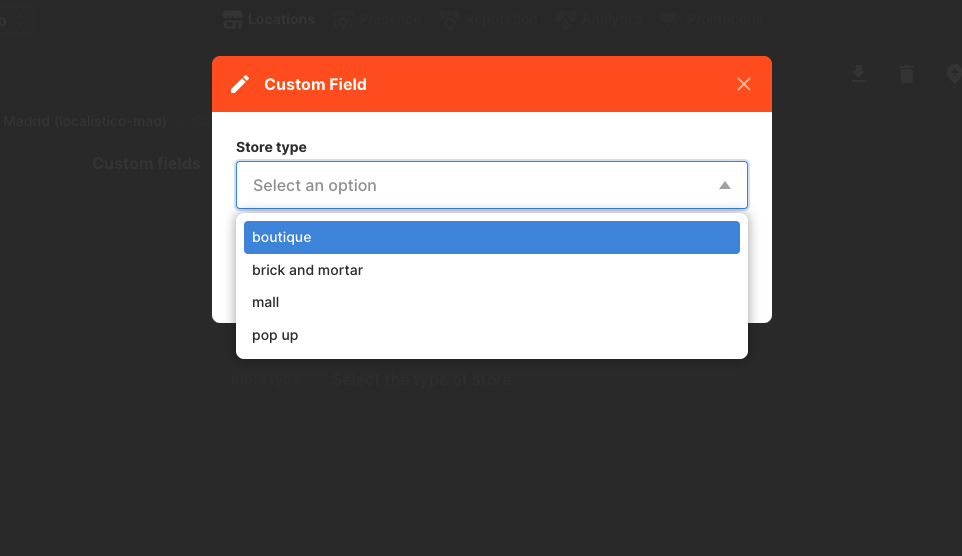
Predefined options:
This allows you to set the options beforehand, and the user only select one or several from the list when editing the venue or the business. This minimises the possibility to type something incorrect in the field when the value defines something on your store pages, for example:
This is how it shows up on the venue settings:
How to set up Custom Blocks?
Setting up the Custom Blocks is almost the same as setting up the Custom Fields. First go to Settings > Advanced Settings and select Business settings or Location Settings, depending on if you would like to create custom fields for the business or for the locations. Now just select Custom Blocks instead of Custom Fields. (See the photos under the article "How to set up Custom Fields.)
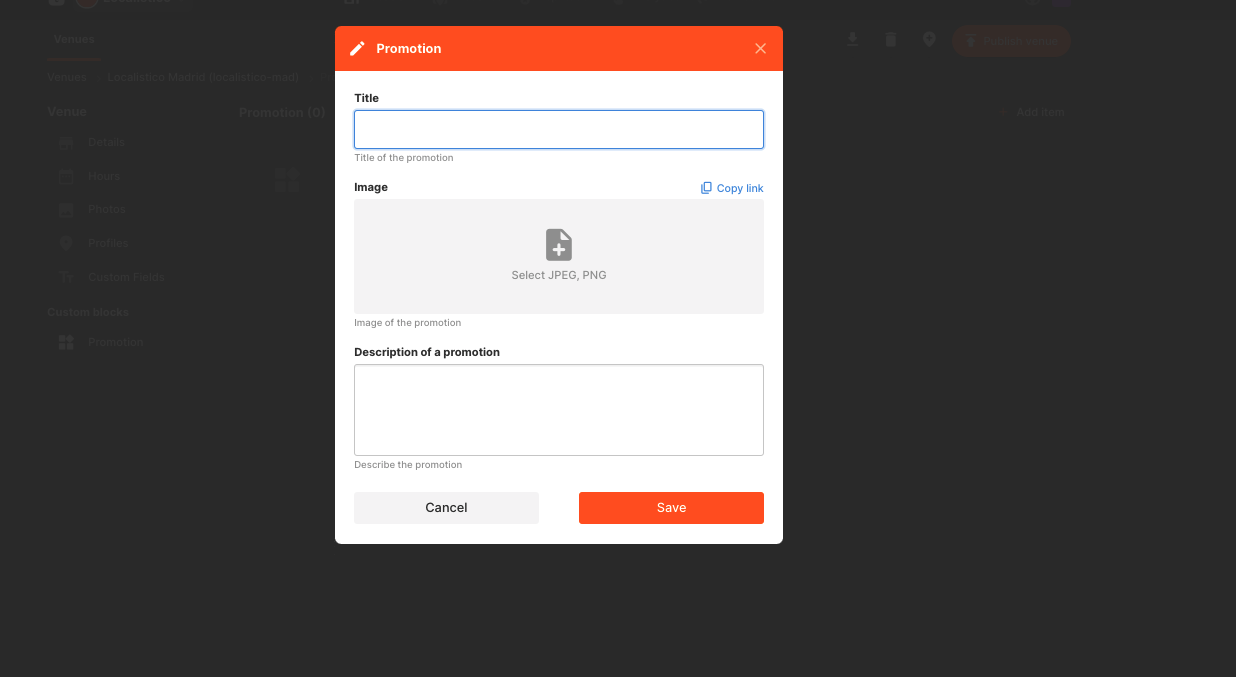
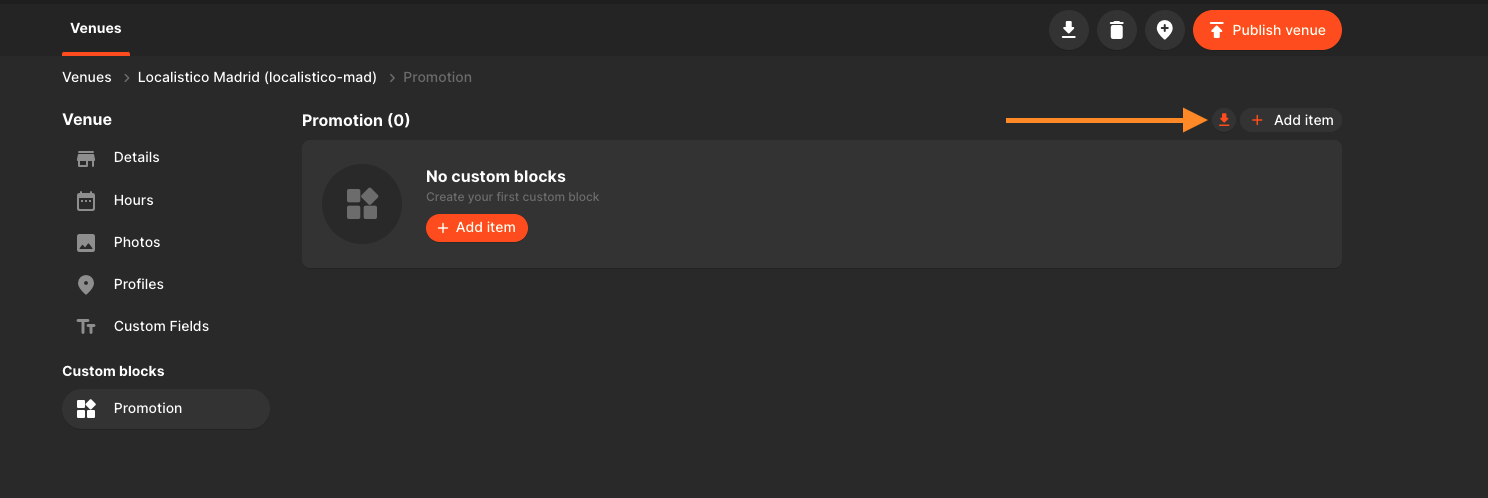
Everything else works the same as for the custom fields, the only thing different is that Custom Blocks allow you to set multiple custom fields under one box. This use case can be used to built for example a promotions block on your store pages. In this example, the custom block includes a field for a title, field for an image and one for the description:
This is how it appears under the venue settings:
Custom Blocks can be exported from a specific venue by clicking on a button here:
How to publish Custom Fields and Blocks to Store Pages?
For Business:
To publish custom fields that apply to a Business, go to Business -> Settings -> Business Info -> Custom Fields/ Custom Blocks section of the app. There, you will be able to fill the available custom fields from the list. Once filled, Click the Sync Custom Fields to Store Pages button:
If the button does not appear, please contact support@localistico.com.
For Venue/s:
To publish custom fields that apply to a Venue, go to Locations and Edit the desired Venue/s. On Venue -> Details, go to the Custom Fields section. There you can fill the Custom Fields that you want. Once this is done, Click the Publish Venue button.
If it’s a bulk publication, users need to select the Store Pages platform.
